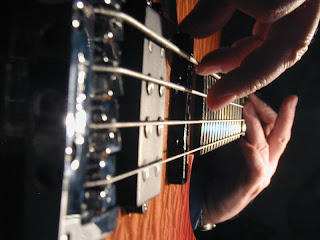
Monday, January 12, 2009

How to order your effects for best bass tone

How to order those effects for the most effective bass tones? This is not a science and there is really no wrong way to do it. The important point here is to use your ears and go for what you like. I know that sounds like a cliche but let's face it - this is your voice on your instument.

For most players there is a logical order for bass effects. For example, a reverb effect which is used to simulate the effect of playing in a church, hall, small room probably makes sense at the end of a signal chain. On the other hand, a compressor that is used to even-out the amplitude variations in on your slapping bass line might make good sense early in your signal chain. Other pedals like tremolo are more flexible in there placement. Again, these aren't rules, just ways of seeing these effects.

You could lump effects into the following high-level categories:
  • fuzz, over drive, distortion, boosters or preamps, buffers
  • compression
  • delay and loopers
  • reverb
  • chorus, phasers, flangers, pitch modulators
  • tremolo and vibrato
  • envelope filters and wahs
  • octave and pitch

I am not suggesting that all these effect be played simultaneously. I am simply offering an opinion on logical sequencing so that when effects are combined, they have natural interaction with each other.

Below is just one possible effects order.

1. Levelling pedals
: Compressor, sustainer.
I place a compressor first in my effects chain as it evens out the dynamics in my playing and sets the source level for the following effects and eventually my amp. You could put a compressor anywhere you want to smoothe out the volume fluctuations in a signal.

2. Basic tone building pedals: Over drive, fuzz, distortion, octave
I use these pedals second to establish tone.
I like to put these kind of effects right after a compressor. Again, you might prefer placing fuzz, distortion, OD before a compressor. I like it after since I can make the overdrive sustain the effect.
I use Octave or pitch pedals to fatten up the established tone from the earlier effects stages. I personally love the sound of octaver pedals for bass.
Octave and pitch pedals make sense to me as a thickening tool for an already good tone.

3. Dynamic EQ shaping pedals: Envelope filters and wahs
I use these filtering pedals to carve out and hone into specific tonal responses from the thick pallette of tones available. Filters make sense to me here since the full spectrum of tones have been built up at the overdrive and octave stages. Many guitar players would disagree here since many use the filters to control the intensity of the distortion or overdrive effect. Once again, this is a matter of taste. For my personal taste on bass - this is the only way to go. Go with your ears.

4. Multiple voice pedals: Chorus, flanger and phaser
The sound of a chorus or a flanger after overdrive sounds lovely as the harmonics really come to life here. Also these kinds of effects can thicken up a signal thinned out by filters and wahs.

5. Tremolo and vibrato pedals: tremolo and vibrato
Traditionally, tremolo effects were built into to amps as the last stage before the power amp. A vibrato is a pitch bend effects. I think these kind of pedals could sound pretty natural just about anywhere after compression,distortion and octave pedals.

6. Delay pedals: Delay and looper pedals
You've built up some sweet sounds at this stage so this is the place to replicate those sounds with a delay or loop. Some would argue this effect should go last. It's up to you. I think reverb make sense at the very end.

7. Ambience pedals: reverb
To me, this is a logical and natural place for reverb in the effects chain. As mentioned earlier, this is the effect used to simulate the sound interaction in a given space. Makes sense to me at the end of a signal chain.

Below is my pedal board. Check it out.

Wednesday, January 7, 2009

Bass effects: 4 reasons to get a true-bypass effects loop switch

If you are running more than about 6 effects you might you want a true-bypass effects looper.

You might be asking, "What is a a true-bypass effects loop switcher?". A true-bypass effects loop switcher is a basically a pedal with one or more effects loops. Each effect loop has an effects send and return like you see on the back of most modern amps. The switches on the these either add or remove the loop from the overall signal. There is a main input and main output on the pedal. See the road rage looper below.


Here's 4 reasons to get a looper.

Reason one:
You can bypass several feet of tone-squelching cable when certain effects are not engaged.
Without getting too technical - the capacitance of a cable is relative to its length. A cable twice as long has twice the capacitance. This capacitance effects the how your pick-ups respond. This capacitance causes a filtering out of the highest frequencies in the signal.
Don't believe me? Compare the difference between a short patch vs. a very long cable. There's a tonal difference. The shorter cable sounds like it has more sparkle - a wider frequency response. The longer has a more fundamental bass tone since the highs are filtered out.


Reason two:
Most importantly, you can bypass non-true-bypass or buffered pedals when they are not engaged. The buffer circuits or pre-amps in these pedals typically cost the manufacturers pennies a piece and are absolute dogshit. Sequence two or three of these buffers into your signal path and listen to your tone turn to mush.

Just a couple of quick notes about buffers. This buffering process is used to bypass the effect when it's not engaged. The buffers act as a kind of relay device for your guitar signal. The buffer takes your signal, copies it, and passes a levelled version to the output of the pedal. To help illustrate the effect of these buffers on you signal, imagine copying a tape cassette, then making a copy of the copy and so on. Obviously the end result is a degraded facsimile of the original version. A degraded facsimile is exactly what your series of buffered pedals will cause.

If you want to identify the offending pedals you can do the following. A quick test to see if a pedal is buffered is to plug your guitar into the pedal. Send the output to your amp. Disengage the effect and simply remove the power to the pedal. A true-bypass pedal doesn't require any power to route the signal to the output side of the pedal. Therefore, if you here your guitar it is true bypass, else it is buffered. That's all on buffers and true-bypass.

Reason three:
You can avoid the usual tap-dance routine you get when you need to engage two or more pedals at once. For example, if you almost always play your octave and your envelope filter together (an awesome effect combo), place them in a single effect loop. With both pedals already on, you simply engage the loop with one tap. No more trying to jump on two pedals at once. You can leave all the pedals on all the time.

Reason four:
If you are manging a pedal board, control of all the effects loops can be centralized in one convenient and ergonomic location. This means no more stepping over other pedals or trying to engage a pedal pedal in the middle of the others with just your big toe. Moreover, this configuration permits you to orient your stompboxes in space saving ways anywhere on the board because they no longer need to be accessible by your foot. This can save cable too. Hell, you could stack some pedals vertically if you wanted.

Check out the pedal board below. Looks awesome right? Looks cool but probably sounds terrible. I count about 8 buffered pedals here. Also imagine trying to hit that tremelo pedal on a poorly light stage. No offence to the owner of the pedal board but this looks like a problem.


Lastly a shameless plug for the boys at Road Rage Pro Gear since they were so helpful to me. I was in touch with Analogman about a looper bypass pedal. A double looper was going to run me $150+ and it's such a simple circuit. Loopmaster makes a less expensive bypass pedal too but still expensive and takes two months to get one built and delivered . The road rage looper 6 channel kit shipped in two days and took me about a day to build. By far the least expensive. Highly recommended Canadian company eh! And no I don't work for them.

Bass effects, junkies and paint metaphors

I am a big junky for effects these days. I'm totally strung out on my EH Octave Multiplexer. I'm always jonezin' for a hit from my Line 6 DL4. My knees are raw from turnin' trix to get a dime-bag of EH Bass Balls.

I've always believed that effects have useful role when used to enhance an already good sounding idea.

For many years I didn't use effects. Here's why.

I remember playing with a guitar player many years ago when I was new to the bass. This guy would play with all kinds of effects all the time. He would combine chorus and flangers and delays to build up these wild sound-scapes. The sounds were over-the-top and in-your-face. The underlying rhythmic, melodic and harmonic ideas were usually pretty dull and predictable. Without the effects tap-dance routine, everything this guy played sounded the same. Where's the creativity in that? His approach to applying effects always seemed really backwards to me and I thank him for the lesson he taught me.

The lesson this experience taught me was that you can't white-wash unimaginative musical ideas with effects and expect to magically transform them into good ideas.

I like to think of effects as paint. Paint requires a good clean surface for it to be effective. If the surface is weak and crumbly like a rotting picket fence, does the paint really improve the overall quality of the fence? Any musician who relies solely on effects to sound inventive isn't fooling anyone. My point being, learn to play you instrument well. Learn to sound great before applying effects. Let the effect add colour to an already solid and strong musical structure.

Monday, January 5, 2009

Got wood for bass tone?

Let's talk wood and how it influences the sound of your bass.

Most modern bass guitars are still primarily made out of wood. There are some high-end manufacturers who are building bass guitars out of graphite, plastics and composites. I won't talk about those materials here but rather I'd like to focus on the most common wood options available to bass players.

Obviously you'll find wood in three areas of construction for a bass guitar: the body, the neck and fretboard.

I found an excellent resource which goes into great detail about wood and it's tonal characteristics. Allow me to summarize in a reasonably consistent way. I will assign a number ratio to the low, mid and hi frequency ranges. For example, a rating of low=5, mid=5, hi=5 would represent a very flat frequency response. A rating of low=4, mid=6, hi=4 would represent a wood with a relatively strong midrange response.


Basswood
  • low=4 mid=6 hi=4
  • Basswood is typically used as a body wood. This is a soft, light-weight and inexpensive wood. Used in the production of a lot of discount basses. IMHO, I wouldn't touch a bass made with this wood.

Alder
  • low=5 mid=6 hi=5
  • Alder is harder, light-weight and fairly inexpensive. This is a very common body wood used by many reputable manufactures. Found standard in many Fender P and Jazz basses. Jaco's 'bass of doom' was an alder body.

Swamp ash
  • low=5 mid=5 hi=6
  • Swamp ash is a little heavier and hard body wood. More expensive. Very beautiful figure in the grain. A body wood very popular with Ernie Ball and many fender models. My personal favourite sounding and looking body wood.


Maple
  • low=4 mid=5 hi=6
  • Good ole Canadian Maple is heavy and hard. Very pretty and rugged. Used both as a body, neck and fretboard wood. There are several varieties of maple. I really love the sound of a maple neck with a maple fretboard because of the bright overtones produced at the fretboard. As a neck wood, it is very commonly used as it transmits vibration very effectively to the body wood thus showcasing the sonic character of the body wood.

Mahogany
  • low=6 mid=5 hi=6
  • Mohagany is considered quite thick sounding as it sounds slightly scooped in the mid range. Used in both body and neck construction.

Rosewood
  • low=5 mid=5 hi=4
  • Rosewood is very common fretboard wood. It's darker sounding than maple with less harmonic overtone content. Good for a big round bass sound.

Pao Ferro
  • low=5 mid=5 hi=5.5
  • Pao Ferro is nice and even response as a fretboard wood. Not as bright as maple and not as dark as rosewood. Alot of boutique basses feature a snappy sounding Pao Ferro fretboard.

As I mentioned in a previous post, I owned a Musicman for several years. It had an all-around very nice sounding wood ensemble of ash, maple and rosewood. I sold that a couple of years ago and replaced it with a customized bass. I now play a knock-off fender Jazz bass with an ash body, maple neck and maple fretboard. Very bright indeed. This is the sound I love. What I like about this combination is that when required I have all the highs I could ever want - when I don't need them I simply roll off some highs with the EQ.


One piece of advice - take it or leave it. Next time you are purchasing a bass, before you plug it in, try playing it unplugged. Place an ear directly on the body of the bass and pluck away. You can hear the actual sound of the wood before the pick-ups and amp have coloured the sound. "You can't make a silk purse out of a sows ear", some wise owl once said. A good sounding unplugged bass is going to provide the foundation sound source for your pick-ups - to your amp - to your cab - to your ears.

Thursday, December 18, 2008

Bass string sound characteristics


The strings you strap to your bass play a very significant role in the overall sound equation. I would argue that your strings are possibly the most significant factor affecting the tone. It also happens to be one of the least expensive ways to change and hopefully improve the voice of your bass.

I believe that every bass guitar is unique. I mean that even the same make and model can sound different. Wood by nature is inherently unique. The grain, density, cut of a piece of wood is like a fingerprint. So is it not possible that these factors make one bass resonate differently than another bass of the same make and model? The strings on your bass are what sets these resonances in motion. Only your ears can really tell you when you've found the right strings for your bass - I mean your unique, one and only bass guitar.

I've been been playing electric bass for 16 years now. In that time I have tried all kinds of strings on my basses. There is so many types and brands to chose from these days it's hard to decide. For bass players, strings are pretty expensive compared to our friendly 6 stringed guitar cousins.

It's definitely a lot cheaper for a guitar player to cough up 6 bucks for a new set of strings on a weekly basis. For a bass you are looking at shelling out anywhere for $25 to $50 just to replace a set of slowly dying strings. I think this makes a bass player think long and hard about the risks of trying out a different set. The guitar players have the advantage here. They can easily experiment with many types, gauges and brands to find the set that make their guitar come to life. In the end, it's an expensive experimentation for bass but well worth it in my opinion.

As for the strings themselves, there are basically four attributes of a bass string that influence the sound: gauge, material, winding, and condition.

The gauge of your strings effects your tone in a few ways. For a heavier gauge string, the most obvious effect is that your tone will have more low end presence or bass. A lighter gauge will have a brighter overall response. Heavier gauges will also sustain longer than a lighter gauge. So if you want big lows with lot's of sustain you might want to try some heavier strings. I'd say anything over 105 on an E string is approaching the heavy side.

A side note about switching from light to heavy or vice versa.
The heavier the string the slower it vibrates under a certain tension. So to get a heavier string to vibrate at around 40 Hz or E, you need to apply more tension. The more tension you apply to all strings will add more concavity to the relief on your neck. This has two effects: the height of your action increases and; your fretted bass will require intonation. More on how to do all this in a future post.

The two most common materials used for making string windings are nickel and stainless steel. Nickel wound strings are definitely darker sounding than stainless steel wound strings. Nickel is a great material as it doesn't corrode. As a result, your fingers slide over the string very quietly. You can typically get a lot of life out of a nickel set of strings. Sound wise, they are well suited to all styles of music. Stainless strings on the other hand are relatively bright with a real emphasis in the high frequency area. They can sound very percussive and tend to bring out the sizzle sounds of your frets making contact with the string. If you are a sloppy player, stainless strings are just going make you sound really sloppy. They are not very forgiving when it comes to mis-hits. Slap players tend to gravitate toward stainless strings because of the bright percussive quality. Stainless strings are pretty abrasive on the frets, fretboard and your fingers. I don't know for sure but I would bet Les Claypool uses stainless as a main ingrediant to his sound. As for tension, I find stainless strings tend to have less tension than an equivalent nickel set. I personally love the sound of stainless. I love to hear that fret noise sizzle.

String winding types include round wound, flat wound and ground wound. round wound are your typical bass string your see set up on most stock basses at the music store. Of the three winding types this is the brightest and most percussive. I'd guess 9/10 bass players use round wounds. Flat wounds or ribbon wound strings are totally smoothe to the touch. You tend to see these string set up on stock fender frettless basses. They have a very dark sound that is a close approximation tone wise to the string used on a traditional upright bass. There is almost no fret noise produced when playing flats. I find that there is almost no harmonic content in the sound produced. Installing a set of flats you will notice that the stings have a lot of tension. Roger waters, Steve Harris and the great James Jamerson all played flats to get there tone. Ground wounds are essentially a hybrid with both flat and round qualities. I assume the name Ground refers to the fact that the rounded texture of the sting winding has been ground down to a flatter texture. These string are pretty cool. They sound darker than rounds but brighter than flats. I've used grounds on a recording where I was trying to get a classic motown sound on my bass.

The last string attribute affecting your tone is the condition of your strings. Dirty strings are going to lose brightness. Dirty strings sound dull and lack harmonics. They sound dead. Corroded strings have the same affect - get rid of them. Lastly, your strings beating against the frets can flatten out spots on your strings. These flat spots wil cause your strings begin to sound out of tune over time. Once this starts happening, it's a good time to get a new set. Simply wiping down your strings after you play will really improve the life of the strings.

Wednesday, December 17, 2008

How does your fretting hand affect your tone?

My left hand (a.k.a the stranger) is my fretting hand. When I first started playing I figured I had to press somewhere in the middle of the two frets for the note I wanted to play. Sometimes I would get some buzzing so I assumed that I wasn't squeezing the strings against the neck with enough force. After a few minutes my left hand would start cramping up from fatigue. My knuckles would turn white as I tried to maintain stamina over three or four bars. The calluses I was developing were getting thicker than raw hide. This approach wasn't serving me well.

What I didn't understand was that the fretboard space between the frets was not the target space for playing the notes. After getting a bit of advice from another seasoned player, I learned that the place to fret the note was immediately behind the fret itself. This seemed intimidating to me at first. Too precise for my skills.

What I discovered was that it was so much easier to play the bass this way. I found that my knuckles weren't turning white from the vulcan death grip I had on the neck previously. I discovered that I had so much more endurance than before. My tone was hugely improved since the this technique virtually eliminated mis-hits, buzzes and flubbed unsustainable notes. My bass sound became much more clean and clear. I could also play much faster since my left hand very relaxed. (Note: I am not a speed freak but I think it's important to be able to have this skill when required.)

Playing the bass just behind the fret is an important technique for getting good consistent sounds out of your bass. On a final note, using this technique makes the transition from a precision to a fretless bass very seamless. This fretting approach is exactly the same technique applied on fretless. Exactly the same technique!

Check out Marcus Miller below. Notice the left hand finger placement. It's right behind the fret. This is where the note sings.

Tuesday, December 16, 2008

Your plucking fingers


What do your fingers have to do with your tone?

Your fingers are the first point of contact between you and the bass. There is obviously certain genetic characteristics about your finger that you can never change, however there are certain things about your digits that are within your control.

Let's start with the plucking fingers. This is your right hand if your are a right handed player.

First and most important, the length of your finger nails play a big roll in the quality and consistency of tone you produce by striking the strings. If your fingernails protrude beyond the tips then you are going to get a pick-like tone. This may be fine if this is a sound you like. The problem is getting a consistent timbre and volume from each attack.

Ideally, you should keep your nails trimmed so they do not extend beyond the tips. The closer the nails get to the tips of your fingers - the more midrange tones you will produce. Keeping your nails very short will yield more bassy tones. You can test this by simply trimming just one nail on your plucking hand and compare the tone between the trimmed nail and the longer untrimmed nail. You can hear a difference. I personally like the sound of my nails when they have just a little length as it helps add some punchy tonal qualities to my sound.

Secondly, the angle and amount of fingertip making contact with the strings will affect the resulting sound. For example, if you pluck with just the very tips you can get a very percussive sounding attack since the tips have an effect of tapping down on the strings. You can also play very quickly as there is little friction and therefore less energy required to get the strings moving. On the other extreme, you can pluck the stings with more of your finger tip by sweeping across the string. You'll get a fatter and warmer tone using this approach. This technique requires more effort as there is more friction on the string and therefore harder to play quickly. I personally like to alternate these techniques to add variety to my bass lines. I'll use just the tips for quick pizzicato lines and more of the tip for walking type bass-lines.

Finally, where you pluck along the length of the string will dramatically effect the quality of sound. I am sure you've noticed that bass players pluck in various spots between the bridge and the neck. Sting for example tends to play very close to the bridge. Stanley Clarke does a lot of playing closer to the neck. Jaco seems to play everywhere sometimes switching positions in the middle of his phrases. So what's the deal? The closer you play to the bridge, the more midrange and harmonic overtone content you will hear. You will also notice that it takes a lot of effort to get a good volume in this position. This is because there is alot of tension on the string here. Alot of players find it easier to play fast lines in this position as the string does not have alot of movement. The closer to the neck position you play, you get less overtones and a bassier content. You will notice that the string has much less tension here. Everywhere in between is just a gradual transition between these two effects. I like the variety you can get from plucking in the various positions. I use my ears to decide what works best for a bass-line.